How to Start an Easy Toy Rotation System
Today’s post is for my fellow parents out there. Over the past year or so I have mentioned a few times, on instagram, that we utilize a toy rotation system for our kids’ toys.
A toy rotation system basically means that you keep some toys in storage instead of leaving them all out all the time.
We love a good toy rotation system in our house. When K was about 11-12 months old she accumulated a LOT of toys and I noticed she was getting overstimulated. I started implementing a toy rotation system and have never looked back. Since we started this, the amount of toys she has access to is manageable for her and for me. An added bonus is that every time I bring out the ‘new’ bin of toys, K acts like she has never seen them before. This means lots of extra independent playtime (aka quiet time for me). Toy rotation day is very exciting for her and for me.
Creating a toy rotation system doesn’t have to be complicated. Keep reading for some suggestions on ways to get started!
1. Get out all the toys.
This is arguably the most difficult step. It can be especially overwhelming if you have multiple children of different ages, or just have accumulated a LOT of toys. Admittedly, we keep our toy collection relatively small (I think?). Figure out what feels manageable to you and then purge what isn’t being played with. Sell items that are in good condition (to pay for the storage bins later), or donate them.
2. Organize and loosely categorize
When ever I am going through our toys I try to group them together by their similarities. For example, food toys, cars, puzzles, animals, balls, dolls, action figures, etc. When you put together your toy rotation bins/baskets, grab one toy from each category so that there is a variety of toys in each bin. This is also a good time to decide what items you would like to keep accessible at all times. Those items will not go in your toy rotation system. In our house, we keep blocks, magna tiles, a tea set, play kitchen food/utensils, and a few dolls out at all times.
3. Get some bins/baskets/bags
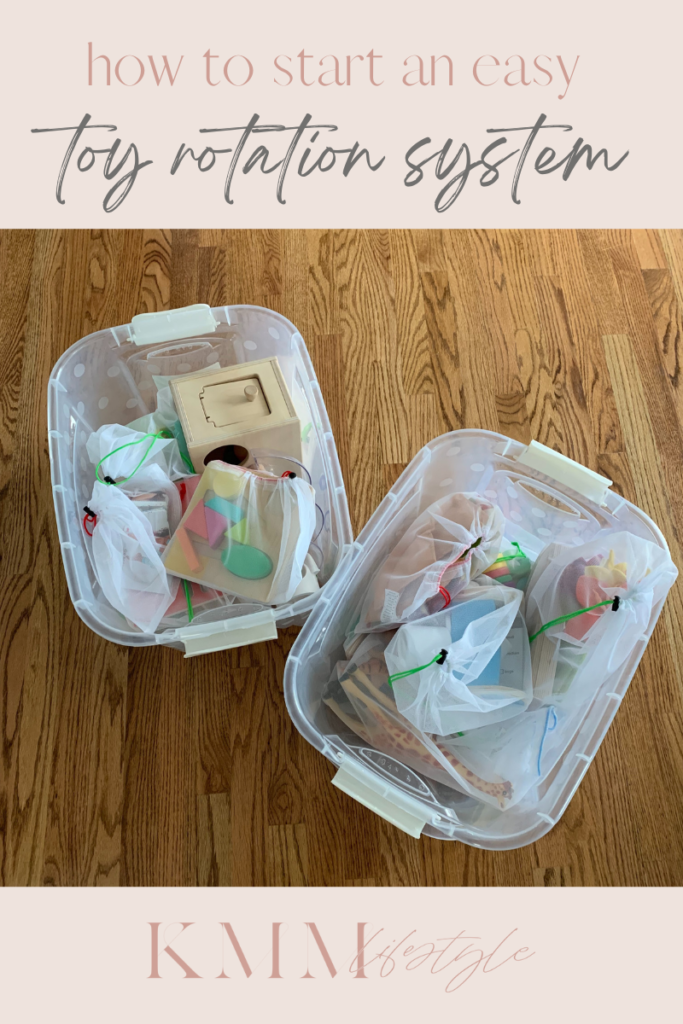
We use clear plastic storage bins to store our toys that are not currently out. I also love using these mesh storage bags to contain toys/puzzles with lots of pieces. Use whatever size will work best for you!
4. Put it together!
Place a variety of toys in each basket/bin from your categories in step 2. Put them into storage and enjoy the extra room to breathe.
5. Rotate as needed!
Rotate the toys from your bins as you see fit! This can be every few weeks or months, whatever you choose. In our house, we do not follow a consistent rotation schedule. I typically bring out the ‘new’ bin of toys when I notice that K is getting bored easily with what she currently has access to. When that happens, the new bin comes out and the toys she was getting bored with go into storage to save for another time.
That’s it! The hardest part is getting started, but I hope this post helps just a little bit. This is what works for us, but it is certainly not one size fits all. No matter how you choose to display or store toys in your home, you are doing a great job.
